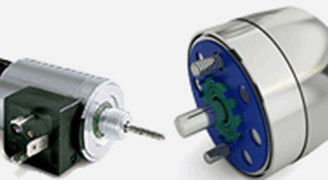
A “Linear Solenoid” (Figure 1) is an electromagnetic device that converts electrical energy into a mechanical pushing or pulling force or motion.
Linear solenoid’s basically consist of an electrical coil wound around a cylindrical tube with a Ferro-magnetic actuator or “plunger” that is free to move or slide “IN” and “OUT” of the coils body. Solenoids can be used to electrically open doors and latches, open or close valves, move and operate robotic limbs and mechanisms, and even actuate electrical switches just by energising its coil.
When electrical current flows through a conductor it generates a magnetic field, and the direction of this magnetic field with regards to its North and South Poles is determined by the direction of the current flow within the wire. This coil of wire becomes an “Electromagnet” with its own north and south poles exactly the same as that for a permanent type magnet.
The strength of this magnetic field can be increased or decreased by either controlling the amount of current flowing through the coil or by changing the number of turns or loops that the coil has.
When an electrical current is passed through the coils windings, it behaves like an electromagnet and the plunger, which is located inside the coil, is attracted towards the centre of the coil by the magnetic flux setup within the coils body, which in turn compresses a small spring attached to one end of the plunger. The force and speed of the plungers movement is determined by the strength of the magnetic flux generated within the coil.
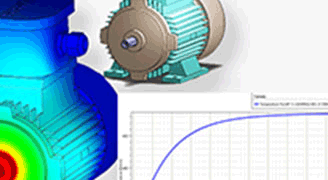
When a coil is excited, an electromagnetic force is induced causing the plunger to translate. This example treats this kind of phenomena. A motion study is setup using SW motion, then the Magnetostatic Study of EMS is coupled to it. The EMS solver and the motion solver will be communicating at each step to exchange information about the force and location of the plunger. EMS will calculate the force at the initial position then the force value is passed to the SW Motion, which in turn takes the force value, applies it to the plunger, calculates the new position and then sends it back to EMS. Then, EMS solver recalculates the force based on the new location and so on. Both solvers keep going back and forth until all steps are covered.
The Magnetostatic module of EMS coupled with the SolidWorks Motion is used to compute and visualize the flux density and the motion of the plunger. After creating a motion analyses in SW and a Magnetostatic study in EMS, four important steps shall always be followed: 1 - apply the proper material for all solid bodies, 2- apply the necessary boundary conditions, or the so called Loads/Restraints in EMS, 3 - mesh the entire model and 4- run the solver.
In the Magnetostatic analysis of EMS, the required material property is the relative permeability (Table 1).
Table1 - Table of materials
Components / Bodies | Material | Relative permeability |
Coil | Copper | 0.999991 |
Outer Air | Air | 1 |
Inner Air | Air | 1 |
Band | Air | 1 |
Plunger | Mild Steel | 2000 |
Stator | Mild Steel | 2000 |
Loads and restraints are necessary to define the electric and magnetic environment of the model. The results of analysis directly depend on the specified loads and restraints. Loads and restraints are applied to geometric entities as features that are fully associative to geometry and automatically adjusted to geometric changes.
In this study, a coil (Table 2) is applied.
Table 2 - Coils information
Name | Number of turns | Magnitude |
Wound Coil 1 | 50 | 0.8 A |
The plunger is where we need to know the virtual work(Table 3).
Name | Torque Center | Components / Bodies |
Virtual Work | At origin | Plunger |
Meshing is a very crucial step in the design analysis. EMS estimates a global element size for the model taking into consideration its volume, surface area, and other geometric details. The size of the generated mesh (number of nodes and elements) depends on the geometry and dimensions of the model, element size, mesh tolerance, and mesh control. In the early stages of design analysis where approximate results may suffice, you can specify a larger element size for a faster solution. For a more accurate solution, a smaller element size may be required
The air region is split into two separate parts: an inner air and an outer air. This strategy is actually recommended for most problems because it allows you to mesh densely around the inner air regions, where the field is significant, and mesh coarsely in the outer air regions, where the field is usually small and decaying. Thus capturing the field variation in the relevant areas without requiring a very large number of mesh elements.
In the study with motion coupling we should use a component named Band around the moving parts. This technique allows the re-meshing of the moving parts and the Band in each step of simulation. The two figures bellow show the mesh in the step 1 (Figure 3) and in the step 11 (Figure 4).
The regular flux, field, current, etc. plots are available in motion studies at each position, i.e. time step. These results can be viewed at each step separately or animated to examine the effect of the motion. Similarly, the tabular results such as force/torque, inductance, flux linkage, etc. can now be visualized at each time step. They can also be plotted versus time, position, speed, and acceleration, e.g. torque vs. speed. Furthermore, the kinematic results such as position versus time can also be visualized right in the tabular results. A more complete motion and kinematics results are readily available in the SolidWorks Motion Manager.
After running the simulation of this example we can obtain many results. Magnetostatic Module generate the results of : Magnetic Flux Density (Figure 5,6), Magnetic Field Intensity (Figure 7), Applied Current Density, Force density(Figure8), Field Operation (B and H derivatives) and a result table which contains the computed parameters of the model, the force and the torque … 2D plots and animation for motion also are allowed by EMS.